

This is the 5th post in a 6 post series on the Compaq Portable 386 Computer. This part focuses on the Conner hard disk, the BIOS settings, its limitations, and alternatives to using a real hard disk. You can jump to:
- First Impressions
- The Gas Plasma Screen
- Booting Up & Opening Up
- The Floppy Drive
- The Hard Disk
- Installing MS-DOS
- Youtube VIDEO REVIEW
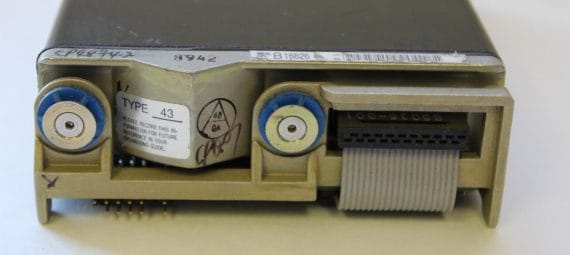
The Original Conner Brand Hard Disks
It’s a good idea to replace the hard disks on older computers, especially those made before the early 1990s. This particular unit had a working Conner brand 20MB 42.9MB hard disk (thanks Thomas!) known as type 43 to the setup / Compaq Diagnostics configuration software. These hard disks were state of the art in 1987 – they were actually one of the first IDE drives available on the market. The Compaq Portables were one of the first attempts to integrate them into a portable computer and make them stand up to the abuse from being constantly moved around (and occasionally being dropped!)


These units were not designed to last 30 years – the lubrication for the bearings and years of use and then lack of use will usually render the hard disks unusable or, at best, unstable. If they are useable, they will be on their last legs – you don’t want to risk using it to set up a new computer and then losing all your data. Remember – these are moving parts – they have a design limit – and are designed to be eventually replaced.
You’ll find the hard disk in an aluminum caddy along with the 5.25″ floppy disk drive tucked into the side of the Compaq Portable 386. For instructions on how to remove the caddy from the computer, follow instructions here. Don’t forget to unplug the hard disk drive and floppy disk drives data ribbon and power cables. I found it helpful to gently use a pair of pliers to unplug the cables from the motherboard.
The Hard Disk Caddy
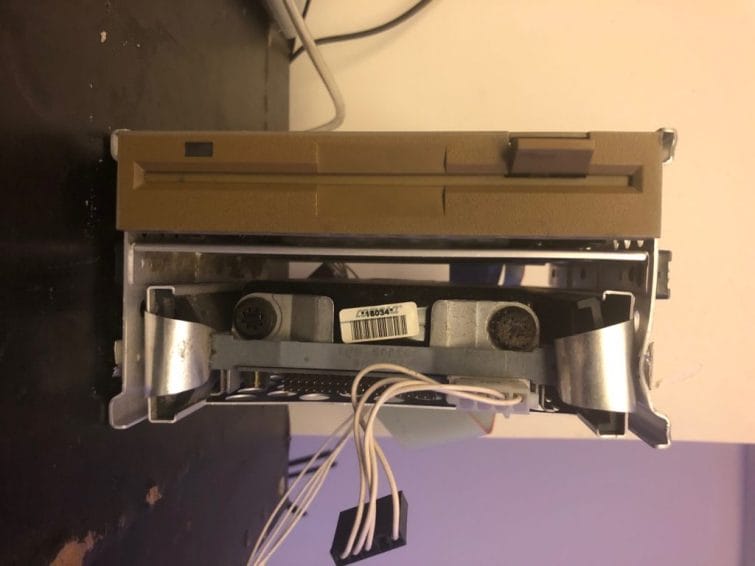
Next, simply remove the screws on the side of the caddy, give it a good jiggle and gently slide out the hard drive.
Hard disks were at one point a new technology – check out this video from 1985 (two years before the debut of the Compaq Portable 386) – from “The Computer Chronicles” talking about Hard Disks. This show aired in San Francisco – during the beginnings of Silicon Valley, so the show can sometimes get a little serious and technical, especially earlier episodes. An interesting product called the “Iomega Bernoulli Box” – a transportable hard disk on a cartridge – is demonstrated at 14:00. The video claims it “can be mailed across the country with no protection” (Riiiight…)
“Would a home user be interested in a 70 megabyte drive? … Probably not” (19:00)
Anyways, back to the hard disk on the Compaq Portable 386 – You have a couple of choices for replacing the hard disk – for the die-hard purist who likes to restore computers to their absolute original configurations, you can find “professionally” restored Conner hard disks on eBay – these are expensive and still operate with hard disk technology from 1987.
Your other choice is to replace it with a more modern hard disk using something like Ontrack Drive Overlay software to “fool” the BIOS – but you still have a somewhat fragile and heavy hard drive in your portable computer. The limitation of the BIOS / Compaq Diagnostic program limits what drives you can use without using something like Ontrack. There are only 47 types of hard drive that the software can natively address, and none of these are what we would consider large capacities.
Compaq Hard Disk Type Table
COMPAQ PORTABLE III / PORTABLE 386 HARD DRIVE TYPES
 Type  Cyl.    Head    Sect.  Write    Land
                               p-comp   Zone
  ------------------------------------------
   1     306     4      17      128      305
   2     615     4      17      128      638
   3     615     6      17      128      615
   4    1024     8      17      512     1023
   5     940     6      17      512      939
   6     697     5      17      128      696
   7     462     8      17      256      511
   8     925     5      17      128      924
   9     900    15      17       -1      899
  10     980     5      17       -1      980
  11     925     7      17      128      924
  12     925     9      17      128      924
  13     612     8      17      256      611
  14     980     4      17      128      980
  15    -- reserved --
  16     612     4      17        0      612
  17     980     5      17      128      980
  18     966     6      17      128      966
  19    1023     8      17       -1     1023
  20     733     5      17      256      732
  21     733     7      17      256      732
  22     805     6      17       -1      805
  23     924     8      17       -1      924
  24     966    14      17       -1      966
  25     966    16      17       -1      966
  26    1023    14      17       -1     1023
  27     966    10      17       -1      966
  28     748    16      17       -1      748
  29     805     6      26       -1      805
  30     615     4      25      128      615
  31     615     8      25      128      615
  32     905     9      25      128      905
  33     748     8      34       -1      748
  34     966     7      34       -1      966
  35     966     8      34       -1      966
  36     966     9      34       -1      966
  37     966     5      34       -1      966
  38     611    16      63       -1      611
  39    1023    11      33       -1     1023
  40    1023    15      34       -1     1023
  41    1023    15      33       -1     1023
  42    1023    16      63       -1     1023
  43     805     4      26       -1      805
  44     805     2      26       -1      805
  45     748     8      33       -1      748
  46     748     6      33       -1      748
  47     966     5      25      128      966
Using a Compact Flash (CF) Adapter
If you want to overcome these limitations, you can use an enhanced BIOS ISA adaptor during the machine’s setup to use larger hard disks or CF cards, but I haven’t tried this out myself yet. An easier option would be to just jump on the Ontrack bandwagon.
What I found to be the best solution was to replace the hard disk with a Compact Flash card to IDE adapter.
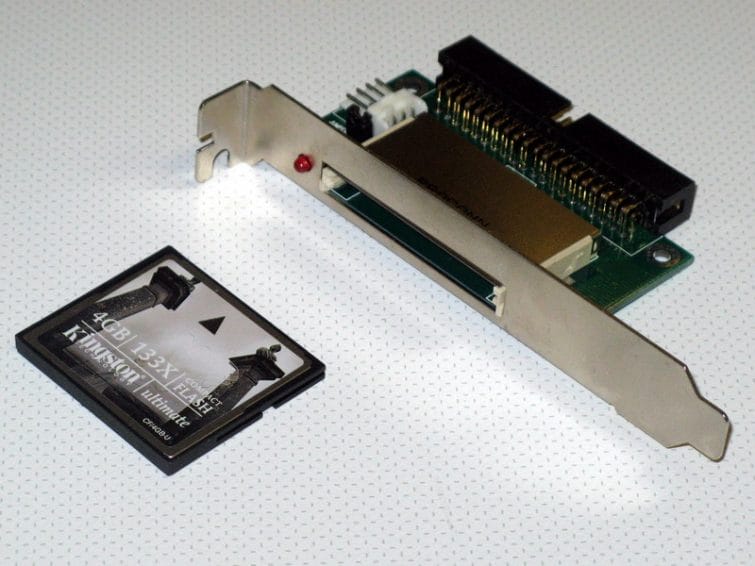
These CF cards offer much faster read/write speeds than hard disks, and they are far lighter. They also have zero moving parts (unless you are using an IBM Microdrive), so they are much more reliable than a hard disk.
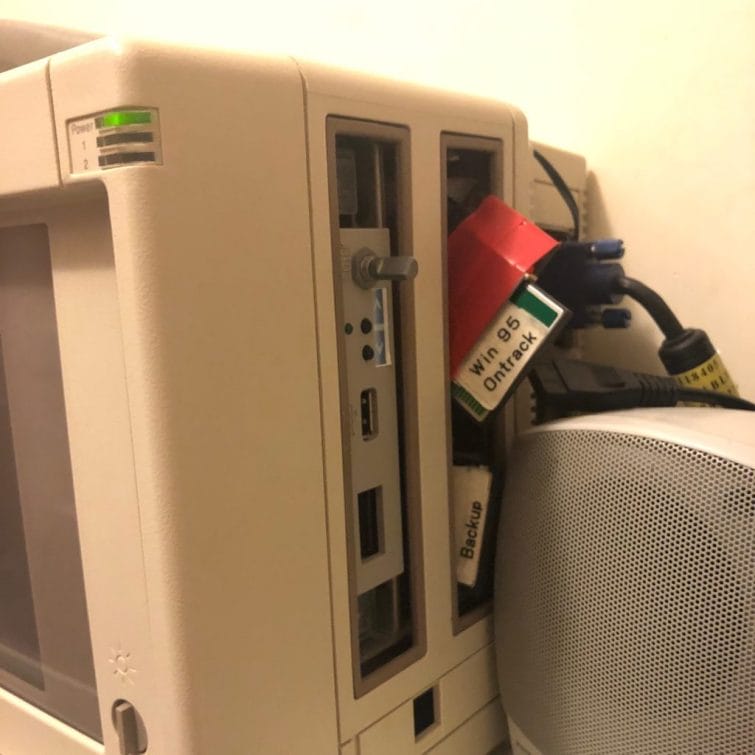
Like their Hard Disk counterparts, these CF to IDE adapters still needs power (usually through a 4 pin floppy drive type plug). I currently have 2 CF cards with 2 CF adapters in my Compaq Portable 386, one with Windows 95 running and using the full 2 GB with an Ontrack drive overlay, and the other running as a backup / non-hot-pluggable compact flash card to move files and programs to my Compaq Portable 386.
When installing a hard disk with this setup, the first step is to ensure you have a hard disk or compact flash card and adapter hooked up correctly, then boot up the computer with the Compaq Diagnostics configuration utility in the floppy drive. If you can’t get the program to boot, you will need to fix or replace the floppy drive first.

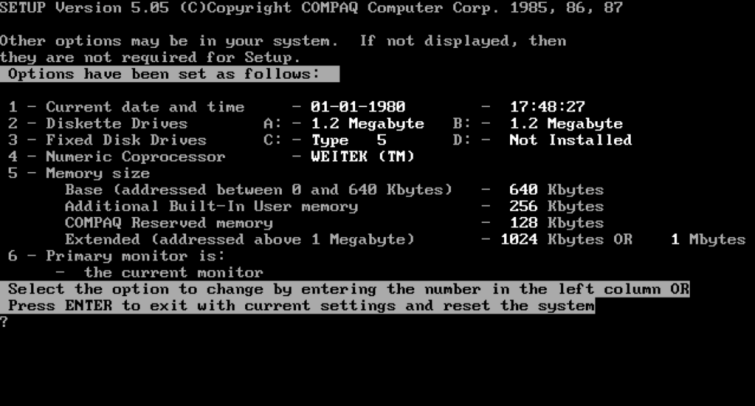
Configuring the Hard Disks
Configuring the hard disks is not the same process as one would expect from a computer from the 1990’s – there is no real “BIOS” – instead, there is a configuration utility that has to be loaded on boot via floppy disk (this process is covered in a previous post). Configuring an original hard disk using this utility is easy if you use hard disks from Compaq of the time – as the software only contains settings for these disks. Simply enter the type number of the hard disk into the utility, save and reboot, then you’re good to go.
If you’re using a CF -> IDE adapter, you can still use your CF card, but don’t get anything over 2GB as that’s the largest drive size possible when running MSDOS.
That being said, the second constraint of CF card size would be the Compaq diagnostic utility – which limits what size you can use by forcing you to set a “Fixed Disk Type” (equivalent to providing the head and cylinder information on a later 90’s PC). This utility only allows you to select from the pre-defined fixed disk types – the largest available is about 300 MBs – far less than the MSDOS limit of 2 GB capacity.
My 2GB CF card seemed to work well with setting the disk type to “Type 38,” which allocates about 300 MB. The computer seems to work fine with this, but you are limited to 300 MB. If you want to use the other 1,700 MB, you can use Ontrack Drive Overlay, which can bypass the configuration settings and allow the full 2GB per logical drive by overwriting the master boot record, or use an enhanced BIOS ISA adaptor to override the existing BIOS settings for the hard drive.
Make sure your CF card is configured to FAT16 using another PC before using it with the computer. Older CF cards should not need any changes to its formatting. However, newer, modern high speed, high capacity CF cards may not work at all even after formatting. Also, go for compact flash cards graded as “industrial” as they are much more durable. This is especially important if you use intend to use Windows 95 due to the swapfile that it creates. This swap file will cause many small writes and reads to the disk that can quickly wear out consumer CF cards.
After you have the hard drive up and running, you can finally install MS-DOS!
Don’t forget to check out my video review on the Compaq Portable 386:
Dear Retropaq,
Nice article! I have my own Portable 386 in fully working conditions.
Just wanted to give you the hint, that the original IDE HDD of Type 43 has not 20MB but 42.9MB.
Great work! Keep going!
Cheers, Thomas
Thanks for that Thomas! I’ve updated the article 🙂
Greetings many thanks for your article.
Compaq are great and very well désigned machines. I’m used to restore old machines from cp/m to pc xt and old laptop machines as a hobby. I’ve an old portable III with faulty power supply with french keyboard. I’ve bought a cheap portable 386 with probably good power supply with us keyboard (unfortunately i didn’t see the difference between the two). What should i do ? Does the power unit are compatible ? I would like to find french keyboard for portable 386 but seems that i’ve to repair the portable iii instead to have the french keyboard (i’m french) – and by the way both keyboard cables litterally are turning to dust.
Thanks for your advice.
Best regards
Hi there! Yes, these early Compaqs are built like tanks. The PSU is interchangeable between the Compaq Portable III and the Compaq Portable 386. Also you can unplug the keyboard (remove keyboard cable cover and pull out the cable on the end attached to the machine). Good Luck!
Greetings
I’ve dismounted all parts including all plastic part, plasma screen board, opened psu…
Fine and compact dust… cleaned all, fan,…
Seems that all caps are not inflated. I do not change them for the moment.
Best regards.